A Step by Step Guide to Testing NuGet Packages Locally
There's a lot of documentation available around NuGet and how to create/publish packages, etc. But when I looked for a simple step-by-step guide on how to test a package locally, I couldn't find any. So here it is:
Open PowerShell as Admin
Install Chocolatey running the command below:
- Install NuGet.CommandLine:
- Check that the latest version of NuGet was installed:
- Change to the directory that contains the application assembly that you want to package and generate a .nuspec file:
This will create a MyApp.dll.nuspec file that describes your package as shown below:
Edit the .nuspec file using either a text editor or NuGet Package Explorer. For more information about the .nuspec file format, please refer to the Nuspec Reference.
Once you are done editing, you can create the package itself:
If no errors are reported, NuGet will create the package (e.g. MyApp.1.0.0.nupkg) in the current directory and you now have a NuGet package that can be tested locally.
- Create a local NuGet Repository:
- Copy the package to your local NuGet
- Next you will need to add NuGet.Local to the package sources in Visual Studio:
In Visual Studio, open up the Package Manager Settings:
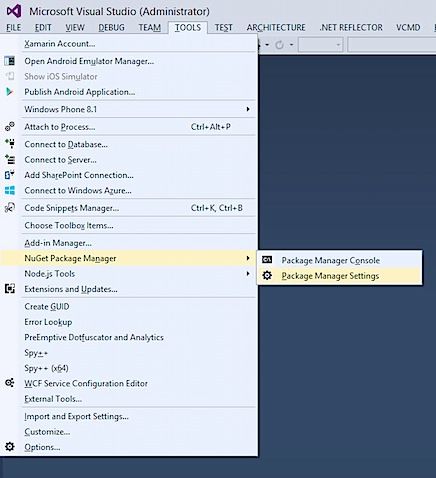
Add NuGet.Local to the list of available sources:
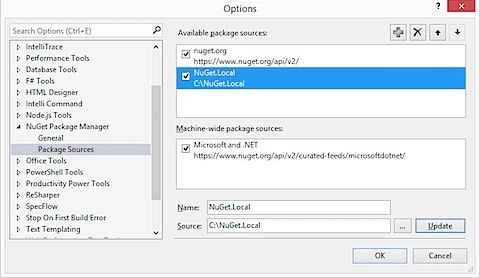
Create a new C# class library project, right-click on the project and select Manage NuGet Packages.
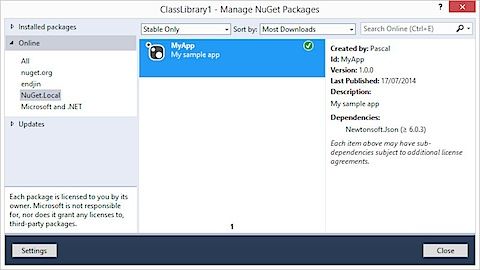
Select NuGet.Local in the list of Online sources and install your package.
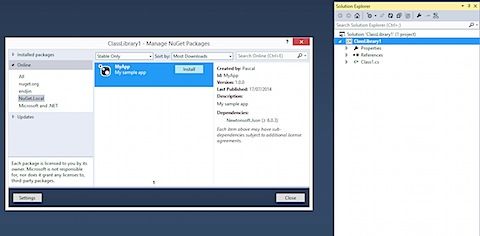
As you can see from the screenshot below MyApp package has a dependency on Newtonsoft.Json:
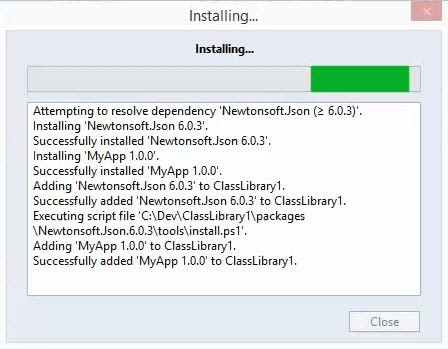
If your package is setup correctly, a successful install should be reported.
For your next step, you can refer back to the documentation for publishing a package.

