Using SmartGit to follow the GitFlow branching and workflow model
This blog explains how you can use the Git client SmartGit to follow the GitFlow model, which Howard described in his series a step by Step Guide to using GitFlow with TeamCity.
GitFlow
GitFlow specifies a standard branch structure and workflow for moving changes between branches, which standardise the way a team uses Git, and keep the repository clean and structured, with important branches protected from ad hoc changes.
The purpose of a branch and its position in the workflow, from development to release, is indicated by its name:
- Release/ - each release branch corresponds to a released version of the application
- Master - a permanent branch acting as a definitive record of the latest released version of the application
- Develop - a permanent branch containing the work-in-progress version of the site, with feature branches being created from this branch and merged back into it
- Feature/ - each feature branch corresponds to work on a particular area (e.g. a bugfix or new feature)
- Hotfix/ - branches for dealing with urgent fixes, which get merged into master (and develop) and then a new release branch when complete.
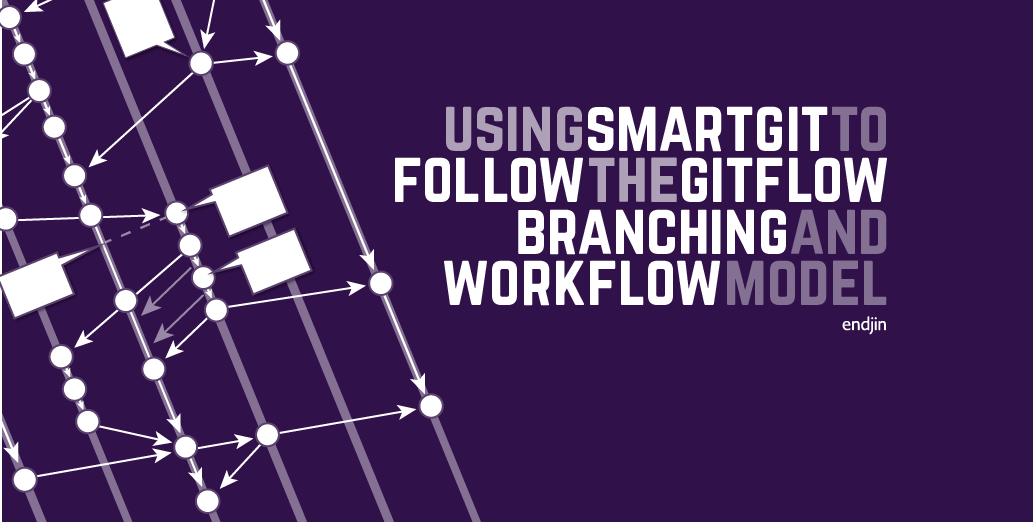
The workflow between branches is shown in the visualisation below, where circles represent commits, and arrows merges. .

Every change made to the code base during development cycles (unless it's on a feature branch for a work item you decide isn't needed) ends up in develop. Master is reserved for the latest released version of the codebase, with the release branches acting as gatekeeper between develop and master. There's a more detailed description of the branch structure and work flow in part 2 of Howard's GitFlow with Team City series.
The upshot of using GitFlow from a developer point of view is that almost all of your development happens on feature branches (or hotfix branches if something urgent crops up).
You can install GitFlow on your machine and use it with command line tools for Git.
The SmartGit client also has some useful tools for following the GitFlow workflow, which I'll walk through in this blog.
Configuring the repository
If a repository isn't already configured to use GitFlow, first off, you can configure it using SmartGit > GitFlow > Configure.
If the repository hasn't been configured to use GitFlow, this will be the only available option at this stage.

At this point you can choose whether to have a 'light' version of GitFlow, which just has a master branch, develop branch and feature branches, or a full version with hotfixes and releases as well. You can also alter the standard branch names here, if you have a particular reason for wanting to.
If develop and master branches already exist in the repository, they will be detected and selected as the master and develop branches for GitFlow.

I pick the simple version if I'm just dipping into a project to help out with a feature, the full version otherwise.
In the version tags field, you can any any text that you want to be prefixed to the version tags for releases. For example, you might have a convention of adding the application's initials.
Configuring the repository for 'full' GitFlow as shown above creates master and develop branches if they don't exist, and adds the following lines repository's git.config file:
[gitflow "branch"]
develop = develop
master = master
[gitflow "prefix"]
feature = feature/
release = release/
hotfix = hotfix/
support = support/
versiontag = ag-
Because the git.config file is a Git management file which isn't usually included in the repository itself, GitFlow installation is on a per machine basis – each member of the team will have to configure their local repository to use GitFlow, if they want to do so.
Starting and finishing a feature
Following GitFlow, to start work on a feature, bug fix or other work item, you create a feature branch. As a reminder of the GitFlow process, SmartGit prompts you if you forget which branch you are on and try to commit any changes on the master branch.

To create a feature branch, use use the Start Feature option.

This will create a feature branch from the develop branch (it doesn't matter which branch you are currently on when you select this command).
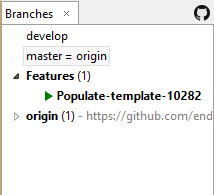
The more often you update your feature branch with any changes form the develop branch, the less likely there are to be conflicts when you come to merge the feature back into develop.
Intermittently, while you're working on the feature, you can use the Integrate Develop option to merge in any updates from the develop branch.
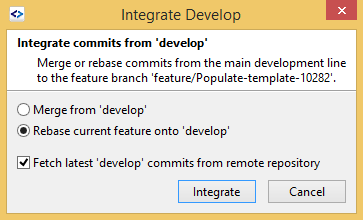
By default, this option also gets the latest remote changes to develop, saving you the trouble of switching to the develop branch and pulling. Merging will create a merge commit with the commit message 'merged develop', whereas rebasing will silently bring changes from develop into your feature branch. (Despite the wording of the explanatory text, the develop branch is not updated by this operation).
If you create a merge commit, this will make the rebase option unavailable for the rest of the lifetime of the branch, as the merge commits in the feature branch cannot be merged in this way.
Once work on the feature is done, and you have integrated develop and tested that all is well one last time, you merge it back into develop and tidy up using the Finish Feature option.
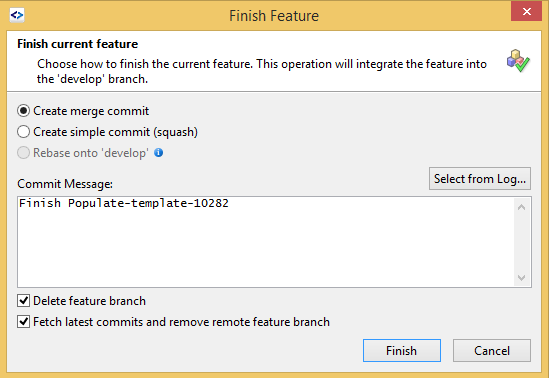
The commit message is automatically populated.
By default, this operation will fetch the latest remote commits for the branch and then delete the feature branch and any remote tracking branch for the feature branch. I wouldn't want unexpected changes popping up at the moment I merge my branch into develop, so I normally pull any remote commits for my feature branch before finishing the feature, but keep these options checked in order to remove the branch cleanly.
You have the option of creating a merge commit that retains all the separate commits made in the feature branch, squashing all commits made on the branch into a single commit, or rebasing the branch which replays all the changes onto develop without creating a commit. (Rebase is greyed out in the example above as I have created a merge commit from develop on the feature branch).
Preparing for a release
When the codebase in the develop branch is ready to release, you can use the Start Release option to make a new release branch from the develop branch.
Procedurally, it might be wise to stop anyone from merging any more changes into the develop at this point.
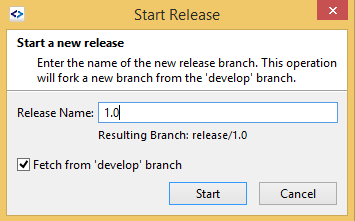
There might now need to be a series of changes made on the release branch, to iron out any issues identified by tests. Once you've satisfied that the code in the release branch is good to go (e.g. you deployed it to a test environment for a final round of testing which passed), you can finalise the release with the Finish Release option, which merges the branch into both master and develop.
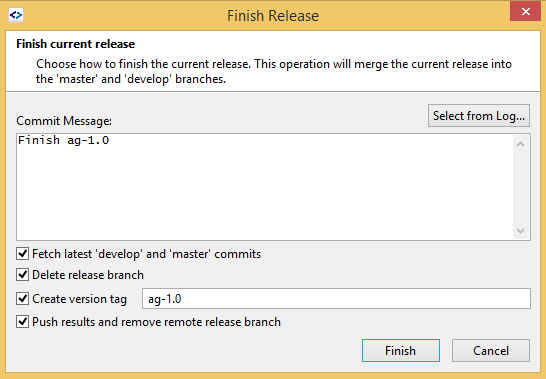
Finish Release tags the release branch with a version tag which is composed of any prefix that you specified during configuration, and then the name of the branch.
By default, the Finish Release operation fetches the latest develop and master commits before merging the release branch into these branches – however, procedurally, there shouldn't be any commits to master or unexpected changes pulled in from develop at this stage.
By default, it also deletes the remote tracking branch for the release branch.
Finally, by default it pushes the updated master and develop branches to update the remote tracking branches ('Push results').
Starting and finishing a hotfix
A hotfix is an urgent fix to the released application.
Because other development might have gone on since the release, and have been merged into the develop branch, to ensure that unwanted changes don't end up getting released, the hotfix branch should be drawn from master, never from develop.
The Start Hotfix option creates a hotfix branch from master.

The 'Fetch from 'master' branch' option determines whether changes from the remote tracking branch for master are pulled before creating the hotfix branch.

While you work on the hotfix branch, the Integrate Develop option is greyed out.
Finish Hotfix adds a version tag to the hotfix branch, and merges it into both develop and master.

The version tag is composed of any prefix that you specified during configuration, and then the name of the branch.
By default, the latest remote commits to the parent branch are fetched (though master shouldn't really have changed while you were working on the hotfix), remote changes to the hotfix branch are fetched and local and remote versions of the hotfix branch are deleted.
The default behaviour also merges the hotfix branch into develop, to keep develop up to date with the changes to the released application, and creates a version tag.
Finally, by default it pushes the updated master and develop branches to update the remote tracking branches ('Push results').
Resources
The main reference used for this blog is the SmartGit docs on GitFlow, which also describes how to migrate to GitFlow from other Git work patterns.

